Are you building or adapting your home? Then you should be very aware of the special attention to the interior that should be paid to the floors. Whether the choice you made was to install parquet, ceramic tile, epoxy resin, rustic floor, stone, laminate, or cement glaze, quality floor construction is important for it to be properly installed and to last as long as possible. After all, it is not something you plan to change every once in a while, and on the other hand, it is something that will be under constant usage.
Therefore, it should be firm, flat, dry and, of course, before laying any floor covering it must be clean. This is especially important so that the bonding materials we use in the installation fully fulfill their task. For example, ceramic tiles can be laid on plaster, screed, concrete, cardboard tiles, already existing ceramic tiles, and plywood. But there are a few specifics and rules for each substrate. And above all, in order to look nice, floors need to be leveled in a proper way.
Normally, to calculate how much time you’ll be spending on the overall renovation works, you want to know how much time this leveling will take? And we give you a full guide on leveling your floors.
Time depends on a couple of factors…
As is the case with anything when it comes to construction, the leveling speed will depend on a couple of different factors.
The first one is the condition of what needs to be leveled. While assessing, experts will take into consideration how much damage needs to be fixed in the current foundation. This, of course, needs to be cured before the leveling, and the time it will consume depends on it.
The second factor is the surface that needs leveling. Leveling the whole house is not the same as doing these works in one or a couple of rooms only. It’s also not the same as performing such works in a huge open area, and in a, so to say, room divided area. You can calculate the approximate time based on the square footage if you click here.

Other factors will influence the speed of leveling, but you can expect it to last at least a week. To understand why it takes as much as it takes, let’s take a closer look at what the process looks like, and what it takes to level a floor.
As we already mentioned, the condition of the surface needs to be assessed first…
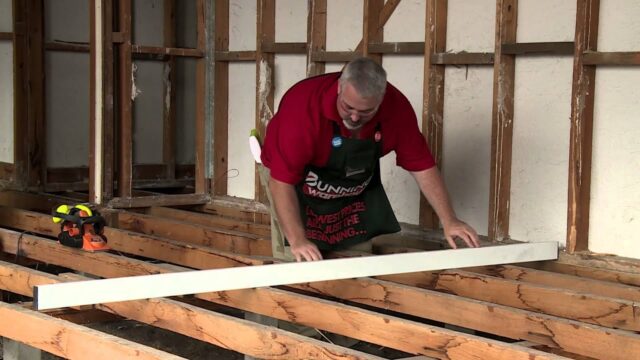
Surfaces have changed over time due to various influences and can be damaged. Check their strength before leveling the surface with a sharp metal tool to work with a solid handle.
It also has to be cleaned…
Remove all dirt, all non-wear particles, and all damaged or non-wear layers of old coatings by scraping. If the surface is greasy, remove the grease with suitable means. The surface must be clean and load-bearing in order for the materials to be applied to adhere to the surface.
Cracks have to be cured…
Find cracks in concrete caused by various factors. They need to be repaired with appropriate materials.
And finally, the leveling starts
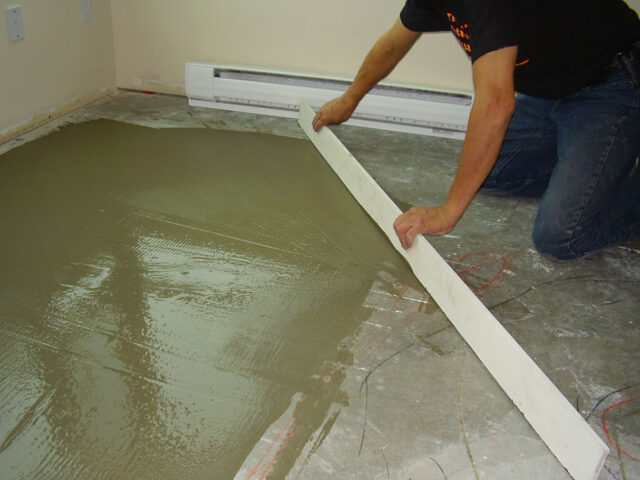
Floor leveling compounds are used to fill holes and irregularities in the substrate as well as to bring the floor to the required height in relation to adjacent floors. We call them leveling masses because they serve for smoothing, leveling, and leveling substrates for laying different floors.
Before using this compound, the substrate should be primed to further harden the substrate and establish a better connection between the substrate and the leveling compound.

There is a large selection of floor leveling compounds on the market, and we can divide them roughly as follows:
- floor leveling compounds in single layers of min. 2mm to the max. 10mm
- floor leveling compounds with a layer thickness of 2mm to 30mm
- fast-drying, quick-drying leveling compounds from 0mm to 10mm
- repair masses for leveling and filling holes and deep irregularities up to max. 50mm
- masses for leveling wooden floors max. up to 10mm
- masses for external alignment
After leveling the substrate with the mass, it would be good to ventilate with a roller (the hedgehog expels the remaining air) to make the mass as firm as possible.
The primer is the bond between the floor leveling compound and the substrate as well as the bond between the adhesive and the substrate.
There are primers for absorbent (concrete, concrete screed, gypsum) substrates and non-absorbent (terrazzo, stone, ceramic tiles) substrates.
Marking on bags of leveling compound
Floor leveling compounds also have different compressive and bending strengths, so it is necessary to use a mass that has the required strength and required characteristics for that floor.
The required compressive strength of the leveling compound for parquet floors is 30 N / mm2, and the tensile strength (bending strength) is 7 N / mm2.
On each bag of floor leveling compound, there is a C / F mark with a number indicating the amount of force after 28 days required for the mass to start cracking.
It is recommended for wooden floors to use leveling compounds that have C30 / F7 markings on the bags, as these are strengths of the mass that can withstand normal stresses on wooden floors.
Before pouring the mass, coating the substrate with primer (for absorbent or non-absorbent substrates) according to the type and need of the substrate.

It is very important that you entrust the job of installing the leveling compound to a licensed and registered floor worker who knows the rules of the profession. This is to ensure the quality of the job done. Remember, the floors have to be installed and leveled properly in order to endure the weight of the furniture and everything else it will be enduring over time. Hence the importance of not trying to save money on such works, but making sure they are done properly.


